How to import and export LwDITA in PageSeeder
| Skills required | XML |
|---|---|
| Time required (minutes) | 45 |
| Intended audience | Developer |
| Difficulty | Medium |
| Category | Document |
Objective
PageSeeder can be used to edit, manage and publish content from different XML formats. This tutorial shows how to import/export and edit Lightweight DITA (LwDITA) XML format in PageSeeder.
It includes how to:
- model the LwDITA format in PSML;
- import LwDITA as PSML using
mapandtopicdocument types; - create and edit
mapandtopicdocuments in PageSeeder; - export
mapdocuments as DocX, PDF and back to LwDITA format.
Prerequisites
To complete this tutorial requires:
- Administrator access to a PageSeeder server.
All the necessary files for this tutorial are on Github .
Tutorial
Model LwDITA in PSML
The following resources were used to map the LwDITA XDITA format elements and attributes to PSML elements and attributes.
- http://docs.oasis-open.org/dita/LwDITA/v1.0/LwDITA-v1.0.pdf
- http://docs.oasis-open.org/dita/v1.2/os/spec/DITA1.2-spec.html for background explanations.
- https://github.com/oasis-tcs/dita-lwdita for DTDs and sample XML.
- PSML elements
For simplicity a one to one file mapping between LwDITA XDITA files and PSML files was used and the mapping below was created. Any customization of PageSeeder document configurations has also been listed in the Document config column.
Mapping of general XDITA elements to PSML
| Component | XDITA | PSML | Document config |
|---|---|---|---|
| Alternate text | <alt> | @alt on <image> | |
| Body | <body> | <section> | |
| Bold | <b> | <bold> | |
| Cross reference | <xref> | <link> for external target; <xref> for internal target | |
| Data | <data> | <property> under <metadata> | topic/document-template.psml can be used to configure property/@name values |
| Definition description | <dd> | <para prefix="[dt]"> content | |
| Definition list entry | <dlentry> | <para prefix="[dt]"> | |
| Definition term | <dt> | @prefix on <para> | |
| Definition list | <dl> | <block label="dl"> | <labeling> in topic/document-config.psml |
| Description | <desc> | <block label="desc"> in <block label="fig"> | <labeling> in topic/document-config.psml |
| Figure | <fig> | <block label="fig"> | <labeling> in topic/document-config.psml |
| Footnote | <fn> | <inline label="fn"> | <labeling> in topic/document-config.psml |
| Image | <image> | <image> | |
| Italics | <i> | <italic> | |
| Key definition | <keydef> | <para><inline label="keydef">[@keys]</inline>[linktext]</para> | <labeling> in map/document-config.psml |
| Link text | <linktext> | See keydef above | |
| List item | <li> | <item> | |
| Map | <map> | <document type="map"> | <creation> in map/document-config.psml |
| Note | <note> | <block label="note"> | <labeling> in topic/document-config.psml |
| Ordered list | <ol> | <nlist> | |
| Paragraph | <p> | <para> | |
| Navigation title | <navtitle> | @title on <uri> or <blockxref> | |
| Phrase | <ph> | if @keyref then <inline label="keyref">[@keyref]</inline>; else if @props then <inline label="[@props]"> | <labeling> in topic/document-config.psml |
| Preformatted text | <pre> | <preformat> | |
| Prolog | <prolog> | <metadata> | |
| Section | <section> | <section> or <fragment> | |
| Short description | <shortdesc> | <description> under <uri> | |
| Table | <simpletable> | <table> | |
| Simple table entry | <stentry> | <cell> | |
| Simple table header | <sthead> | <row part="header"> | |
| Simple table row | <strow> | <row> | |
| Subscript | <sub> | <sub> | |
| Superscript | <sup> | <sup> | |
| Title | <title> | <block label="title"> in <block label="fig">; <heading level="2"> in <fragment> | |
| Topic | <topic> | <document type="topic"> | <creation> in topic/document-config.psml |
| Topic metadata | <topicmeta> | Not applicable | |
| Topic reference | <topicref> | <blockxref> | |
| Underline | <u> | <underline> | |
| Unordered list | <ul> | <list> |
Mapping of multimedia XDITA elements to PSML
| Component | XDITA | PSML |
|---|---|---|
| Audio | <audio> | <properties-fragment type="audio"> |
| Autoplay | <media-autoplay> | <property name="media-autoplay"> |
| Controls | <media-controls> | <property name="media-controls"> |
| Loop | <media-loop> | <property name="media-loop"> |
| Muted | <media-muted> | <property name="media-muted"> |
| Poster | <video-poster> | <property name="video-poster"> |
| Source | <media-source> | <property name="media-source" count="n"> |
| Track | <media-track> | <property name="media-track" count="n"> |
| Video | <video> | <properties-fragment type="video"> |
These are all configured in topic/document-template.psml and topic/editor-config.json.
Mapping of XDITA attributes to PSML
Following is a detailed breakdown of mapping between the languages.
Architecture attributes
| Component/Set | XDITA | PSML | Document config |
|---|---|---|---|
| ditaarch | @xmlns:ditaarch | Not applicable | |
| DITAArchVersion | @ditaarch:DITAArchVersion | Not applicable | |
| Domains | @domains | Not applicable |
Localization attributes
| Component/Set | XDITA | PSML | Document config |
|---|---|---|---|
| Direction |
| Not applicable | |
| Language | @xml:lang | Not applicable | |
| Translate | @translate | Not applicable |
Data definition
| Component/Set | XDITA | PSML | Document config |
|---|---|---|---|
| Name | @name | @name on <property> | topic/document-template.psml can be used to configure @name values |
| Value | @value | @value on <property> |
Figure display attributes
| Component/Set | XDITA | PSML | Document config |
|---|---|---|---|
| Expanse | @expanse | <inline label="expanse"> | <labeling> in topic/document-config.psml |
| Frame | @frame | <inline label="frame"> | <labeling> in topic/document-config.psml |
| Scale | @scale | <inline label="scale"> | <labeling> in topic/document-config.psml |
Filtering attribute
| Component/Set | XDITA | PSML | Document config |
|---|---|---|---|
| Props | @props | <inline label="props"> | <labeling> in topic/document-config.psml |
Footnote control
| Component/Set | XDITA | PSML | Document config |
|---|---|---|---|
| Callout | @callout | Not implemented but could use <inline label="callout"> |
Image size
| Component/Set | XDITA | PSML | Document config |
|---|---|---|---|
| Height | @height | @height | |
| Width | @width | @width |
Note type
| Component/Set | XDITA | PSML | Document config |
|---|---|---|---|
| Type | @type | @label on <inline> |
Processing attribute
| Component/Set | XDITA | PSML | Document config |
|---|---|---|---|
| Output class | @outputclass | Not implemented but could use @role on some elements |
Reference attributes
| Component/Set | XDITA | PSML | Document config |
|---|---|---|---|
| Link target |
| @href and @frag | |
| Format of target resource | @format | @mediatype | |
| Relationship of source to target | @scope | Not implemented but could use @labels |
Reuse attributes
| Component/Set | XDITA | PSML | Document config |
|---|---|---|---|
| Identifier |
| @id on parent <fragment> | |
| Content reference | @conref | @href on <blockxref type="transclude"> |
Video size
| Component/Set | XDITA | PSML | Document config |
|---|---|---|---|
| Height | @height | <property name="height"> | topic/document-template.psml and topic/editor-config.json. |
| Width | @width | <property name="width"> | topic/document-template.psml and topic/editor-config.json. |
@conref support
This tutorial has been implemented with support for @conref for <audio>, <dl>, <dentry>, <note>, <ol>, <p>, <pre>, <section>, <simpletable>, <ul>, <video>
To use @conref with the following objects, the content must be wrapped with a <p> element: <fn>, <dt>, <dd>, <li>, <sentry>, <sthead>, <strow>
Configure LwDITA project customizations
- Login to PageSeeder as an administrator.
- Click on New project and enter the project name "lwdita", any description and any owner, then click Submit.
- Click Home page then New group and enter the group name "tutorial", any description, then click Submit.
- Select Developer perspective from the cube icon (top left).
- Select Project files from the Dev menu.
- Drag the
ps-lwdita-[date].zipfile (downloaded from Github) to the drop files area. - Click the Import icon next to this zip file.
- Select Toolbox from the Dev menu, then click on Project files under PageSeeder publisher on the right.
- Drag the
pspublisher-lwdita-[date].zipfile (downloaded from Github) to the drop files area. - Click the Import icon next to this zip file.
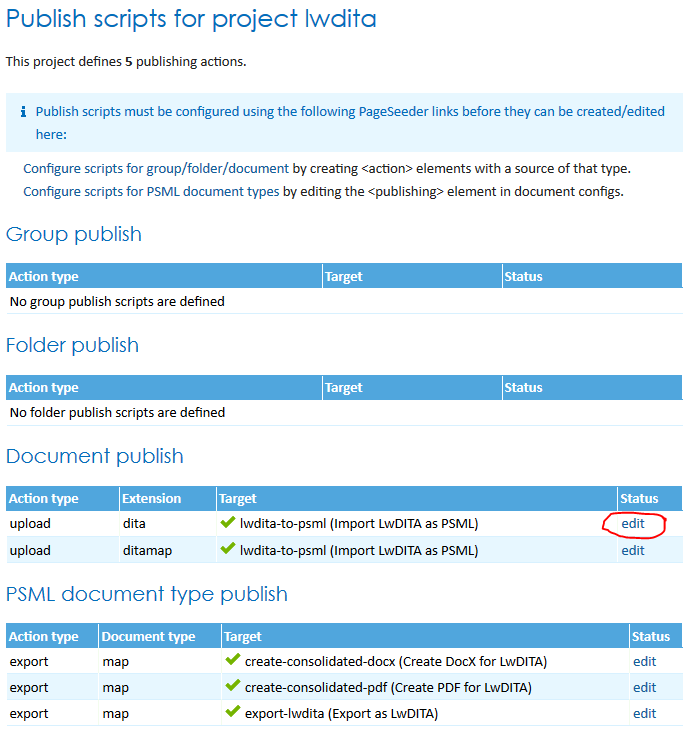
- Click on Publish scripts and then click edit to the right of the "upload dita" row (see below).
- This is the ANT script used to import a .dita file as PSML. Click on the Help (?) icon (top right) to find out more information.
- Click on Go to folder and then on lwdita-to-psml.xsl.
- This is the XSLT used to convert a .dita file to a PSML file. It implements all the mapping rules described above and is executed by the ANT script.
- Go back to the first Project files page (it should be in another tab) and click on Home.
Import LwDITA as PSML
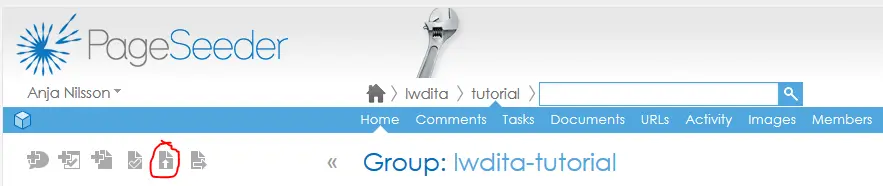
- Ensure you are on the home page for the “lwdita-tutorial” group then click on the upload document icon (see below).
- Drag the
sample-lwdita.zipfile (downloaded from Github) to the drop files area. - Click the Unzip icon next to this zip file.
- Click the List media button (bottom right).
- Click Options next to DITA or DITAMAP and click on Import LwDITA as PSML.
- Click the Continue button at the bottom.
- Wait a little while until the Confirm upload dialog appears, then click Continue and wait for the message "Successfully uploaded".
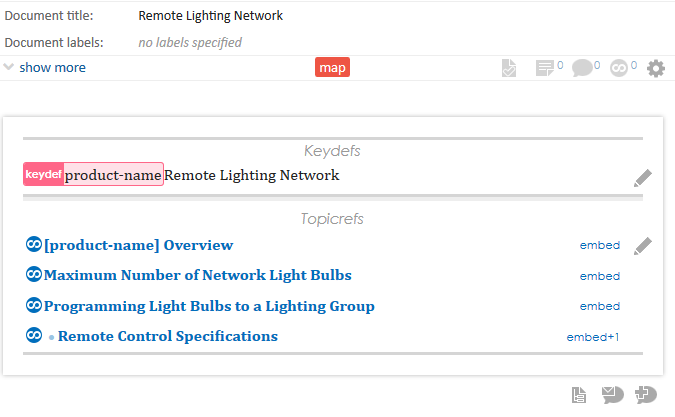
- Under this message click on the remotelighting.psml link. This is the main ditamap file converted to PSML and should look as shown below.
- Click on the links to explore the topic documents.
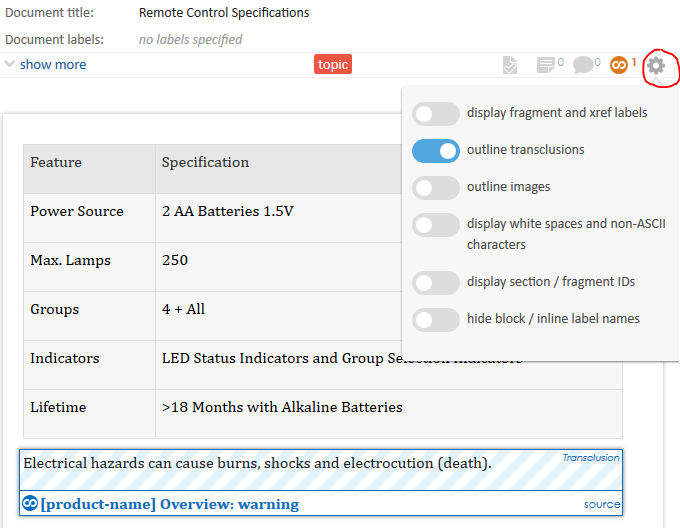
- Click on the Remote Control Specifications topic, then on the document settings icon and select outline transclusions (see below). This shows how the DITA conref appears as a transclusion at the bottom.
Create and edit map and topic documents
- On the
mapdocument click the pencil next to the Topicrefs section. - Click Create Document.
- Select LwDITA topic and type a title "My topic".
- Click More document options then
- type a Document ID “lwdita-tutorial_mytopic” (for this tutorial we use the format [full group name]_[topic ID]) - note the underscore before topic ID.
- type a Description “This is my topic.”
- Click Submit then click Save.
- Click on the My topic link and then click the add fragment icon (on the right).
- Type “This is my content.”
- Press enter and type “This is my note.”, then select the text, right click and select Add block 'note'.
- Click Save.
- Mouse over the pencil icon (on the right) and then the add fragment icon and choose Video.
- Next to Autoplay: select “true”.
- Next to Source: type a URL to a video (e.g. https://www.youtube.com/watch?v=...) and click Add.
- Click Save.
- Select Document config from the Dev menu.
- To see how creation and editing are configured click on edit under “Document template”, “Document config” and “Editor config”, next to the “map” and “topic” document types (see below). When viewing files click on the Help (?) icon (top right) to find out more information.

Export map documents as DocX, PDF and LwDITA
- On the
mapdocument click the export icon (top left).

-
Click on Create DocX for LwDITA and click Export. Open the document in Word and notice that the
keyrefshave been replaced by thekeydeftext "Remote Lighting Network" and the video/audio by links. This is done by thelwdita-post-transform.xsldescribed below. The "My topic" content should be at the bottom. -
Click on Create PDF for LwDITA and click Export. It should have the same replacements as for the DocX.
-
Click on Export as LwDITA and click Export. Extract the
.zipfile and open the.ditamapand.ditafiles with a text editor (e.g. Notepad) to check the content. Note the newmy_topic.ditafile that was not in the originalsample-lwdita.zipfile. -
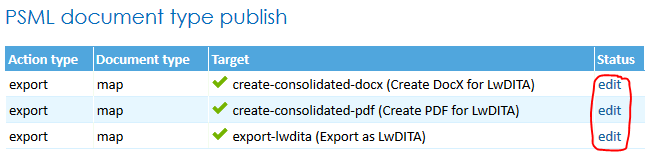
Select Document config from the Dev menu and then click on Publish scripts (top right).
- Click edit to the right of the "(Create DocX for LwDITA)" row (see below).
- This is the ANT script used to export as DocX. Click on the Help (?) icon (top right) to find out more information.
- Click on Go to folder and then on lwdita-post-transform.xsl.
- This is the XSLT used to replace the
keyrefsby thekeydeftext and the video/audio by links. It is executed by the<ps:process>ANT task. - Click on Publish scripts and then on edit to the right of the "(Create PDF for LwDITA)" row (see below). This is the ANT script used to export as PDF.
- Click on Publish scripts and then on edit to the right of the "(Export as LwDITA)" row (see below). This is the ANT script used to export as LwDITA.
- Click on Go to folder and then on psml-to-lwdita.xsl.
- This is the XSLT used to convert a PSML file to an LwDITA file. It implements the reverse of all the mapping rules described above and is executed by the ANT script.