How to constrain new documents to a specific location or naming rules
| Skills required: | XML |
|---|---|
| Time required: | 15 |
| Intended audience: | Developer |
| Difficulty: | Easy |
| Category: | Document |
Objective
This tutorial explains how to configure PageSeeder so that any new documents of a specific document type conform to rules that specify where the document must be stored and what it must be named.
Using this capability reduces the amount of learning necessary for new users, plus improves the data quality and user productivity.
Instructions
Create a new document type
This step can be skipped if the documents to be changed already belong to a custom document type.
Otherwise, follow the tutorial How to create a new document type.
Create the document configuration
Go to the Template configuration page, click the Create link for your document type in the Config column:
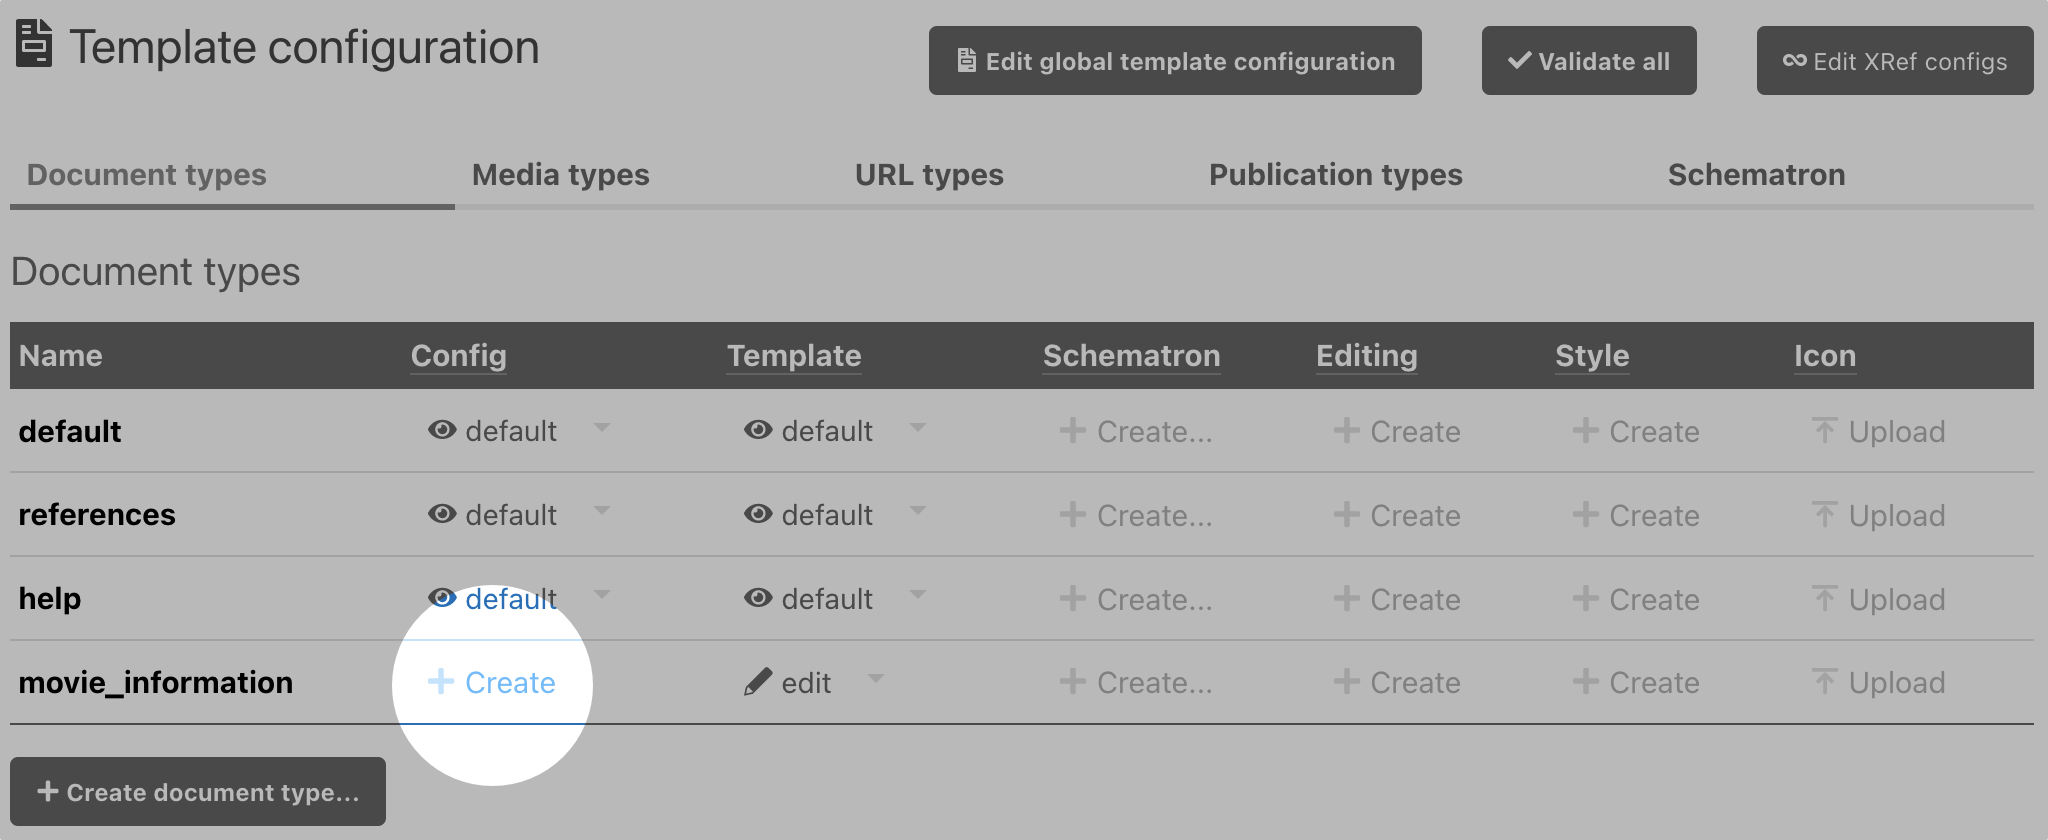
If a document config already exists for your document, the link is edit instead, but it opens the same panel.
It opens the code editor panel titled document-config.xml
This creates document-config.xml file that contains the configuration for the document type including:
- where the documents are saved and what conventions are used to name them
- which editing interface should be configured to open the content
- which labels are available in this document
- which content roles are available in this document (different to user roles)
- which publishing options should be available to a particular type.
This file for a document type is located in the /psml/[document-type]/document-config.xml of your project template.
Edit the document configuration
You can now use the configuration to decide where the documents of this are created.
Edit ‘document-config.xml’ in the code editor panel and replace it with the following content:
<?xml version="1.0"?>
<document-config>
  <creation>
    <title>movie_information</title>
    <folder context="/documents/films" />
  </creation>
</document-config>
We use the <creation> element to control where the file are created and the convention to name them. The <folder> element so that it contains the path to the folder where files of that type are created.
Check the configuration
Once the file is saved, the new configuration applies immediately.
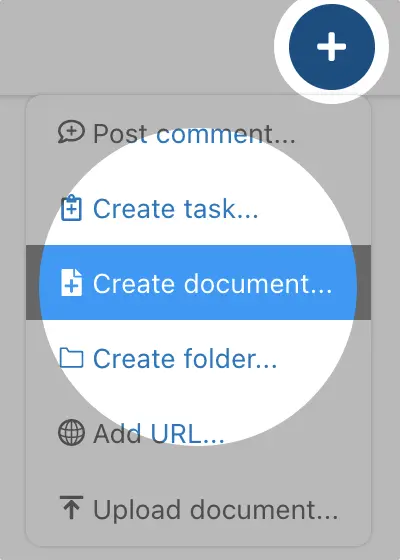
Let’s check that the configuration worked. Return to a group within your project and click on the plus button and select the Create document... option.
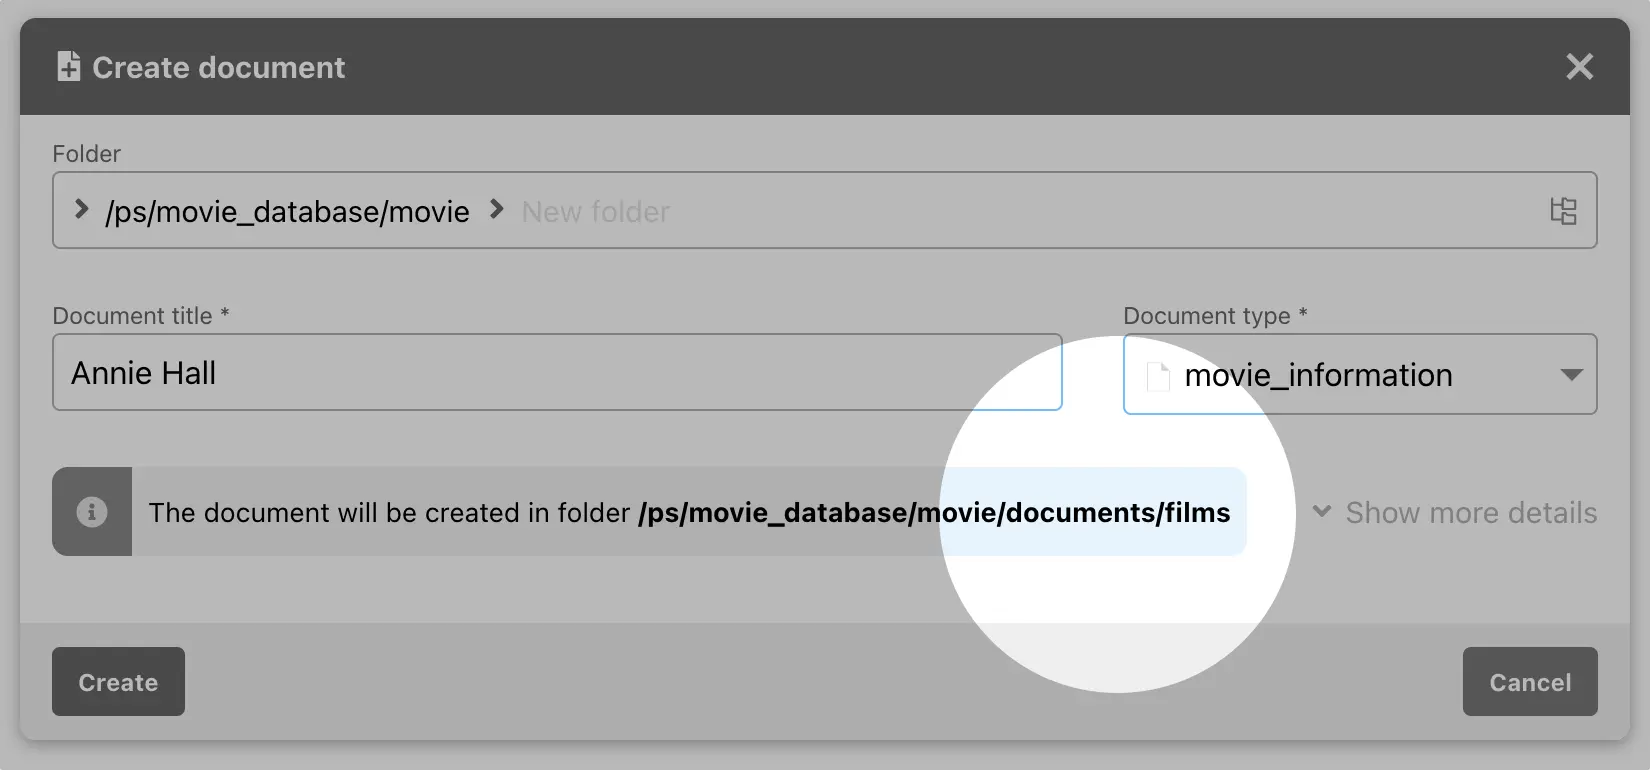
When you select, the ‘movie_information’ from the Create document dialog, it displays a note to let you know that documents of that type are created in a specific folder.
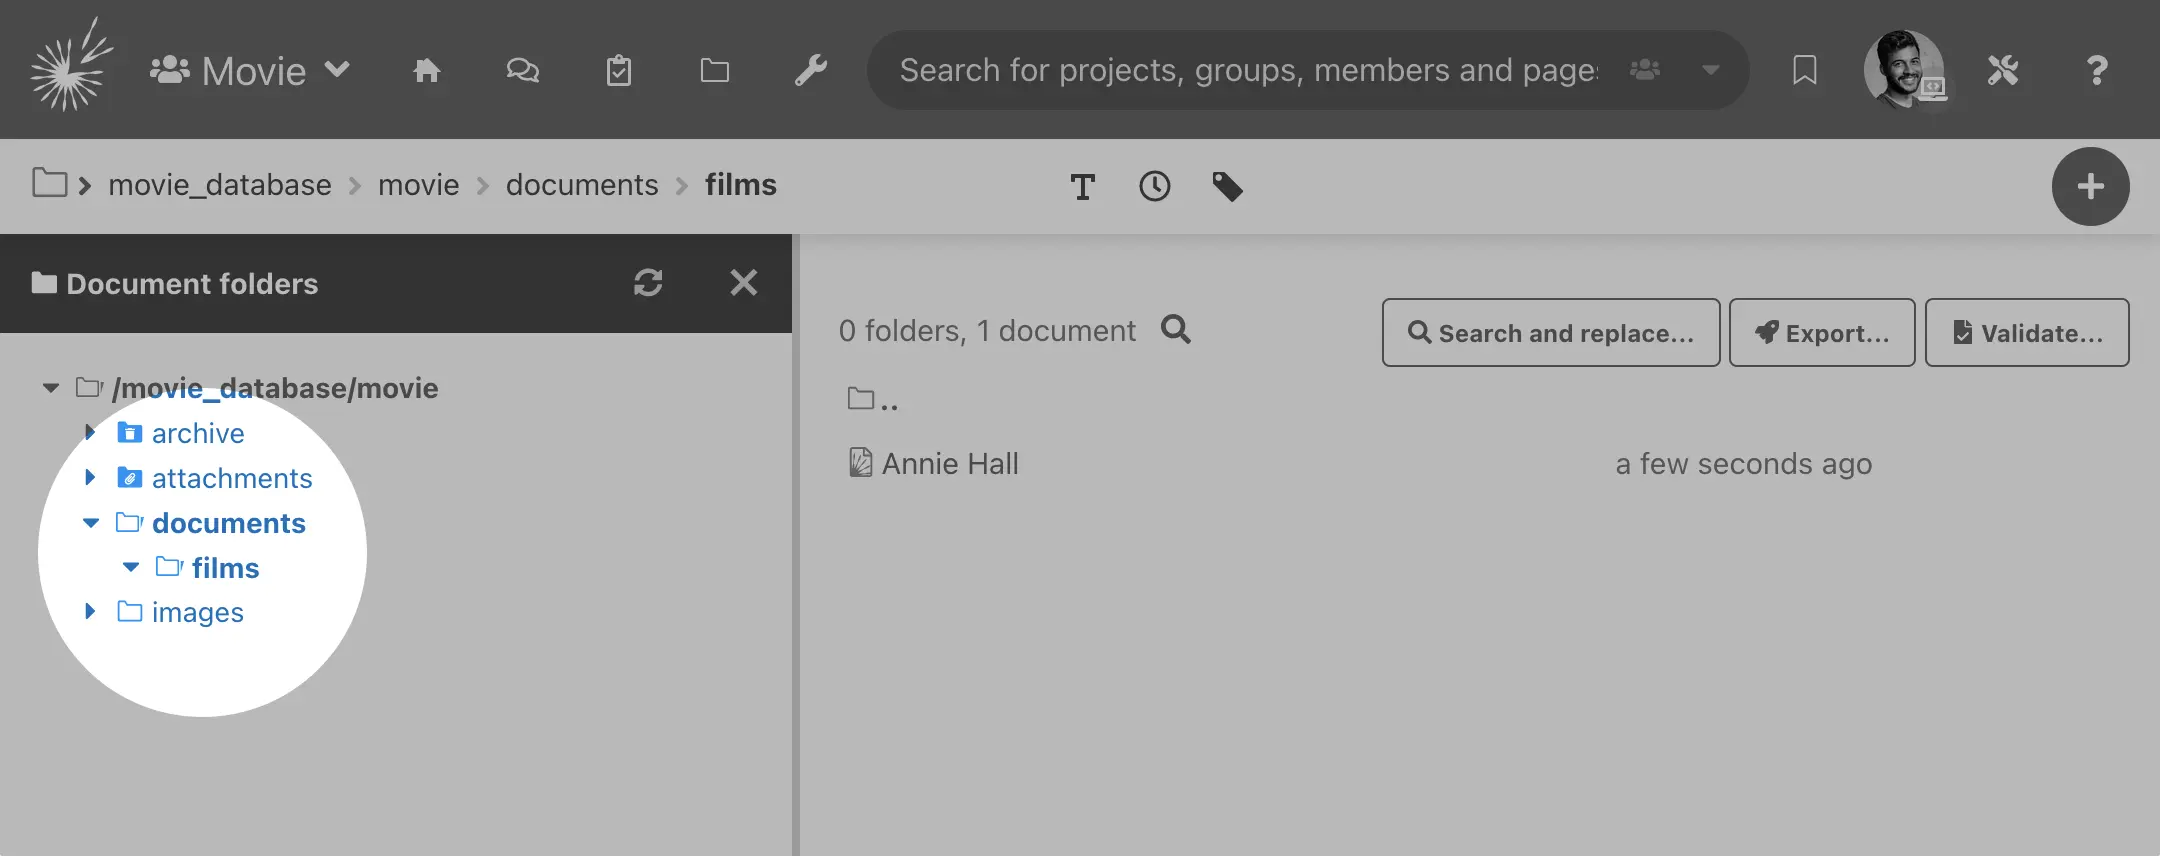
When you click Create, document is created in the specified location. You can check that is the case when you go to the folders page: